Elementary Classroom Job Ideas That Actually Help Teachers!
Keeping a classroom running smoothly on your own is no small task, and that’s exactly where classroom jobs step in. Raise your hand if you’ve ever spent ten minutes searching...
Feeling overwhelmed by your overflowing classroom cupboards? Let me take you through, step by step, how to organize your teaching resources. It probably won’t take as long or be as arduous as you think! I don’t know if you’re like me, but I usually find the tasks that I keep putting off, don’t take nearly as long as I expected them to! So, let’s get started!!!

I’ve found this to be the best place to start! Otherwise buying new bits and bobs for the classroom and having no room for them can be frustrating and overwhelming.
First things first – get rid of that junk that has been left in the classroom from that teacher who was in there in 1990! Then look at each remaining resource and ask yourself: will my students use this item this year? If this answer isn’t a definite yes – get rid of it! You want to be Maria Kondo’ing your cupboards. If something’s not sparking joy, it’s gotta go!!!
Cleaning out my cupboards from time to time helps me to see what I have with fresh eyes – especially when I know which upcoming topics or themes we’ll be focusing on. You may not even remember what resources are tucked away! And those things you know you’re not going to use? There might be another teacher who could use them, or an op shop that will gladly take your unwanted items.
A simple way to get your messy cupboards sorted is by grabbing some tubs or bins from Kmart or the Dollar Tree. There are *so* many types available. I’m positive you’ll find some that suit your needs and style.
I’m not going to lie, purchasing baskets and tubs may involve a bit of an outlay to begin with, but do remember that these are things that will travel with you throughout your teaching career. If they’ve come out of your own personal expenses, then you are entitled to take them with you when you move on from the school.

As we all know, we live in a digital world. Almost everything is digital nowadays. So to minimize the hundreds of things you have in your classroom – recycle those hard copies! If you know you have a digital copy of something, get rid of the hard copy! If it’s something you really need to keep, file it into binders or folders so it’s out of the way, and easy to find when you need it.
Organizing your digital resources well is just as important as keeping your physical resources organized. It took me a lot of ‘learning the hard way’ before I started making sure each resource, document or image I downloaded was saved with an appropriate title in an easy to find folder! Scrolling through hundreds of items in your ‘downloads’ folder ain’t fun, and feels like such a waste of time.
Which leads me to something else super important – BACK UP YOUR HARD DRIVE! Alternatively, move to a cloud based storage system. I can’t stress this enough. Losing documents means losing *hours* of work… and re-doing those hours of work! It’s heartbreaking stuff.

I feel these guys are the ultimate way to organize your teaching resources. I’m obsessed with my teacher trolley (or 10 drawer cart for my US friends!) and I even have one in my home! They make it so easy to keep your resources handy and organized!
Once I’ve got my week planned, all of my important documents and worksheets are tucked away safely, ready for me to grab whenever I need them. I also allocate a drawer to emergency teachers. That way, if I wake up unwell and unable to go to work, all I have to worry about is getting enough rest because I know my fill-in teacher will keep my kids entertained and busy!
My 10 drawer cart or teacher trolley labels are editable, so you can fill you trolley with anything and everything you like! They’re available in *seven* different styles, so you’re sure to find a set that matches your classroom aesthetic!
You can see them all here:
Boho Rainbow
Cactus
Tropical
Botanical
Rainbow
Earthy Rainbow
Modern Boho Vibes


This is totally a matter of personal preference, and it may also be determined by how your school does things. Filing resources by subject or by grade level might work best for you. Whichever you choose, stick to it the whole year! In my early teaching years, I remember finding it so enjoyable working out filing systems, but then the novelty wore off and I got slack… and then when I couldn’t find what I needed? It was the worst!
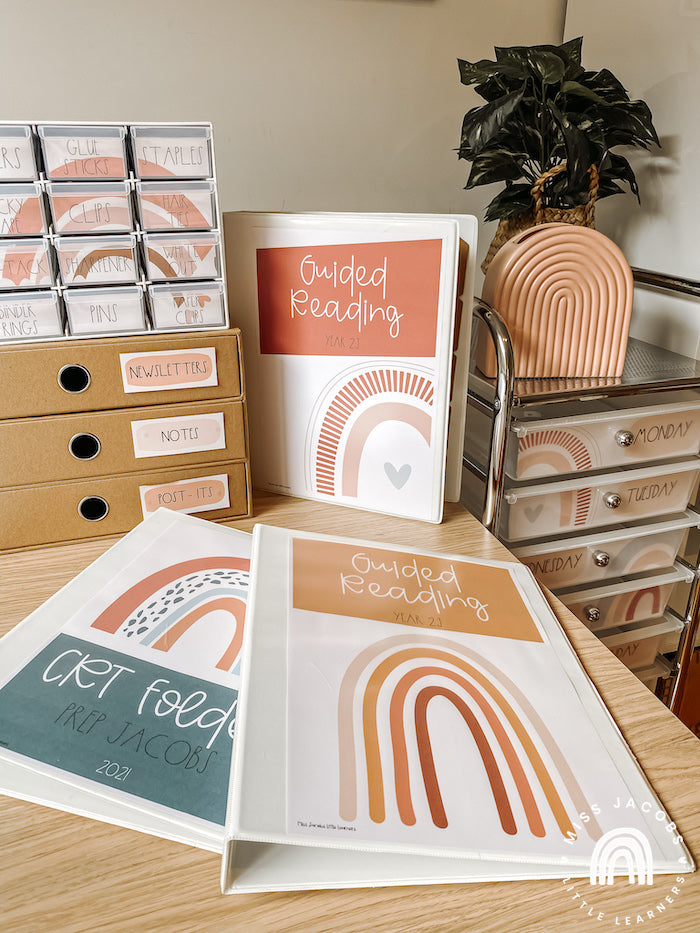
I solved my problem (and hopefully yours!) by creating a tonne of editable binder covers and spines to keep folders organized and looking fab. To keep things looking consistent throughout the classroom – ‘on trend’ and aesthetically pleasing – I’ve created seven styles of binder covers so they can be in the same theme as your classroom decor.

Another thing that I recommend to help you organize your teaching resources, is using a teacher toolbox. This thing is such a time saver. No more looking around for rubber bands, blue tack, sticky tape, thumb tacks, or even your own hair ties! I’ve made editable labels for teacher toolboxes so you could literally store anything you like in there! These toolbox labels have been specifically created to perfectly fit the Bunnings Handy Storage Organizer.
Check out this video quickly showing the different styles my teacher toolbox labels are available in.

If there’s one thing I couldn’t live without as a teacher – it would be labels! (After coffee, of course!) It doesn’t really make sense to have a filing system or tubs of resources that aren’t easily identifiable when you need to grab them quickly. So make your life easier, and label everything!
And for your students? When everything has its place in the classroom, and is labelled accordingly, it makes it so much easier for your little learners to pop things where they belong when they’re finished with them!
Over in my shop, it’s editable classroom labels galore! I’ve got labels for your teacher trolleys, as well as your teacher toolboxes. Both of these resources come in 7 styles, so you can find something to suit your classroom.
Curious about how you’d apply the labels to your teacher trolley? Watch this video here!

That’s a lifelong skill right there! I know as a parent, my kids are much better at listening to their educators when they’re asked to pack up, than they are me!
So teachers – let’s set out students up for life! By taking the time to help them understand WHY it’s important to take care of their and the classroom belongings, we’re putting them in good stead for taking care of things of value down the track.
You might feel like a broken record repeating yourself constantly… but soon enough, your students will catch on that the faster they pack away, the more time they have for the fun stuff!
When students can’t find their personal belongings or something within the classroom, it’s an opportunity for a gentle, teachable moment. You could try: “Ahhh… you can’t seem to find xyz? This is a great example of why it’s so important to pop our things back where they belong, isn’t it?”

Take a step back and enjoy the good lookin’ classroom you’ve created! And don’t let all your hard work go to waste – keep it as organised as you can. It’s such a time saver when you know where everything is and you don’t have to waste time looking for something that’s right under your nose!
If you have any other ideas on how to organize your teaching resources, I’d love to hear them! Comment below, and I’d love to share them over on my IG page with the MJLL community!


Teacher and Founder of Miss Jacobs Little Learners. If you’re dedicated to making a positive difference in the lives of your students – I’m here to help you.
Read MoreMiss Jacobs’ Little Teacher Community is a dedicated space for teachers just like you!
JOIN HERESign up as a Miss Jacobs BFF member today and get access to free resources!
sign up
Keeping a classroom running smoothly on your own is no small task, and that’s exactly where classroom jobs step in. Raise your hand if you’ve ever spent ten minutes searching...

I know, I know—you've been searching for the ultimate classroom glow-up, and I'm right here with you! One classroom theme has been consistently stealing the spotlight in the BEST way....

It’s that magical time of year when everything feels a little brighter, a little busier, and, let’s be honest, a whole lot more chaotic. Christmas classroom decor is one of the...

There’s a certain undeniable magic that drifts into the classrooms once December rolls in, especially when Christmas classroom decor starts to fill the space. While you're wrapping up lessons and...
These high-quality, affordable classroom decor bundles feature a wide range of modern classroom themes loved by thousands...